Usage basics for dummies
If you’re new to Solid Explorer have a look at this guide to learn how to use the app and how it works. Let’s start.
Main screen
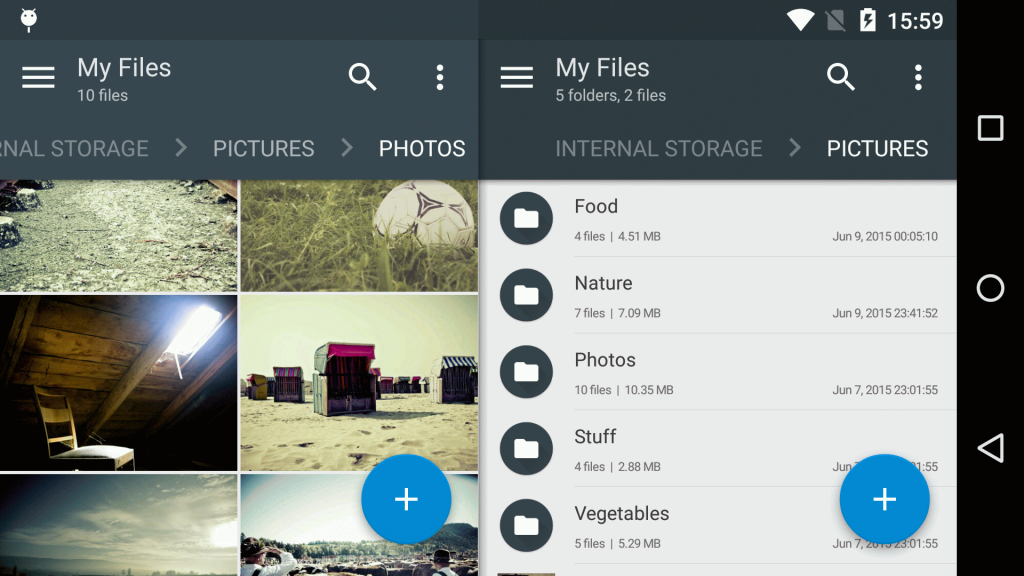
 The main screen of Solid Explorer consists of two panes serving the same purpose as in popular Total Commander – they’re independent windows and display lists of files. If you’re familiar with this app you’ll find yourself in Solid Explorer very quickly. If you rotate the device, you’ll see both panes side by side. This behavior can be disabled in settings, but it’s recommended for big screens. You can switch panes by swiping left and right or just touching them in dual mode. Each pane has a toolbar at the top, like every Android app. You already know what it does so I hope the explanation is not needed. Below the toolbar there is another bar called breadcrumb, which displays your current location in the file system tree. You can tap on it to open corresponding folders or tap on current folder name to refresh the file list. Below the breadcrumb there is a file list, which takes the rest of screen space. In the bottom right corner you can see a floating action button (FAB), which offers you an ability to add new content – folders, empty files and cloud connections.
File lists
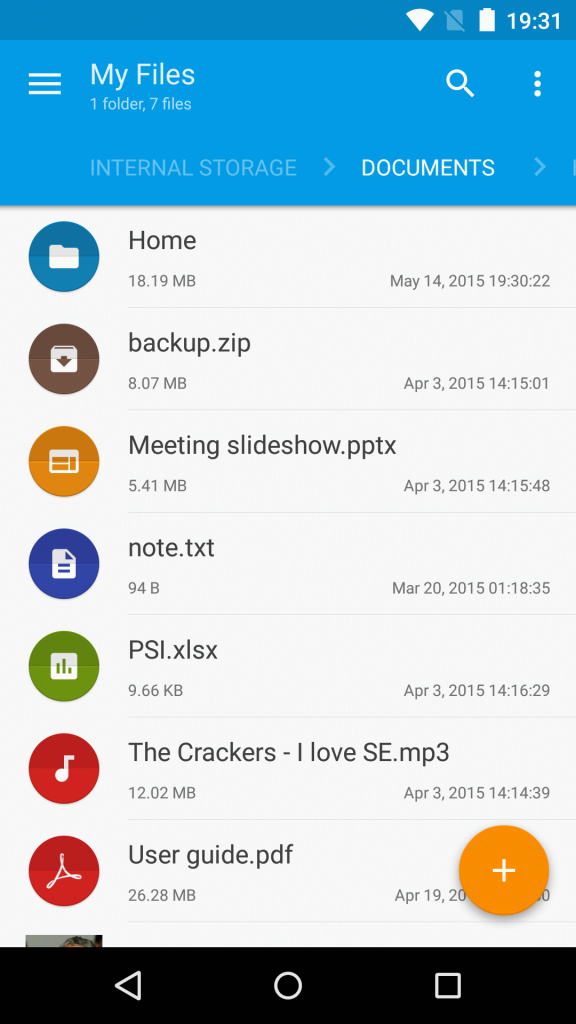
You can change the appearance of file lists by tapping overflow menu -> view options and selecting desired view mode and sort order. You can even set different preferences per folder, so for example your camera folder will be always displayed in gallery mode. More adjustments can be done under Folder options in the same menu. You can enable showing folder size or grouping the files into sections. Enabling folder sizes will make directory listing a little slower, but it will let you see how many files are present inside the folder and how much space they take. Enabling file sections will add alphabetical scroll just like in the contacts app. File lists can be also resized, so if you feel that the rows are too small or too big you can resize them with a pinch gesture. This gesture can be disabled in the settings to prevent accidental triggering. There’s also a Filter tool for filtering currently displayed list by name.
In order to do something different than opening a file or folder you need to perform a selection. In Solid Explorer you can do it in two ways: long click a list row or tap on the icon. After selecting the first file you’ll see that the toolbar has changed its appearance. Now you see actions applicable to the selected files. Here is a quick explanation of each action:
- copy – puts selected files in the clipboard and sets the type of action to Copy
- cut – same as above, but the action is set to Move
- delete – deletes files and folders
- archive – creates an archive from selected files. Read more…
- hide – hides selected folders permanently
- share – opens the sharing dialog
- select all / select inverse
- add to bookmarks – appears only with folders
- open with – open selected file with other application
- create shortcut – puts a shortcut to selected file or folder on your homescreen
- rename – changes the name of file/folder
- properties – display properties of selected files/folders
You can manipulate the number of selected files by using select all/inverse options or tapping on the files. Please note, that after enabling selection mode, another long click will select a range of files, not a single one. It’s also worth reminding that tapping on the icon works only in List and Compact display modes.
File operations
When you tap the copy or cut action, the toolbar switches to the clipboard mode. It displays how many items are in the clipboard, new folder action and action type indicator. If you tap the action type indicator, it will show you the clipboard contents. You will also notice, that FABs has transformed into paste buttons. In this mode you can change working directories, but you can’t select any more files. If you want to undo your choice, just tap the tick button on the left. Tapping the FAB will paste the files from clipboard in current folder and start the file operation. Immediately after that, the FAB will transform into a progress indicator. You can tap it to see a window with more detailed information, such as transfer speed, current file, elapsed time, estimated time left and operation description. Tap the progress chart to transform the window back to the FAB. If you want to completely close the window, tap the down arrow at the right edge below the progress chart.
You can also copy or move files with drag and drop, which works in the same pane and between them. Just select a bunch of items, perform a long click on them and wait until the items will jump out of their place in the list and move towards your finger. Now you can drop them to another folder or to the second pane. If you want to drop them on a folder, you need to wait a second until the folder opens. After dropping the files you can choose whether you want to copy or move them.
Searching
There’s a separate article about that. Read more here.
Navigation drawer
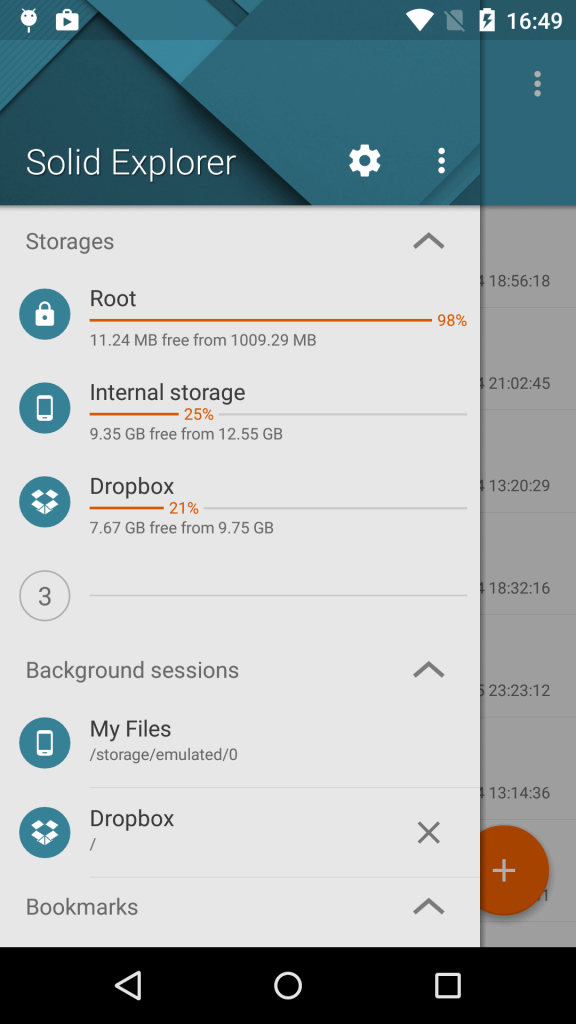 This is the home screen for all your files, just like My Computer on Windows. Going from top the first section is Storages, which contains internal storage, external storages and all your cloud connections. If the list gets longer than 4 elements, it will collapse into 3 elements and show an expander as the 4th element. The next are your bookmarks, which are just shortcuts to folders located either on your device or in the cloud. The next section is called Collections and contains virtual folders grouping your files into categories. You can read more about collections here. The last section is Toolbox and its purpose is to display useful utilities such as recent files or hidden folders manager. Furthermore, it will also display installed plugins, such as FTP Server.
Under Storages section you can see how much space is taken by each storage. However, some locations don’t provide any ability to check used/free space, so instead of usage indicator they will display connection information. For example, under FTP servers you’ll see a description like this: ftp://spider@myserver.com:2222/Files
From time to time you will also see a Background sessions section. As the name says, this section holds sessions, that are currently not visible. Let’s say you open your Google Drive cloud in the first pane. Existing file list is moved to the background and Google Drive is displayed instead. If you open another cloud, Google Drive will be also moved to the background and will be replaced by another session. This is why this section exists. You can go back to them just by tapping corresponding item or close immediately using the X button.
You can change the order of your storages and bookmarks by tapping the overflow menu and choosing Sort storages. You can even set your custom order, but you need to change it in the Storage Manager or Bookmark Manager.
Storage manager and Bookmark manager
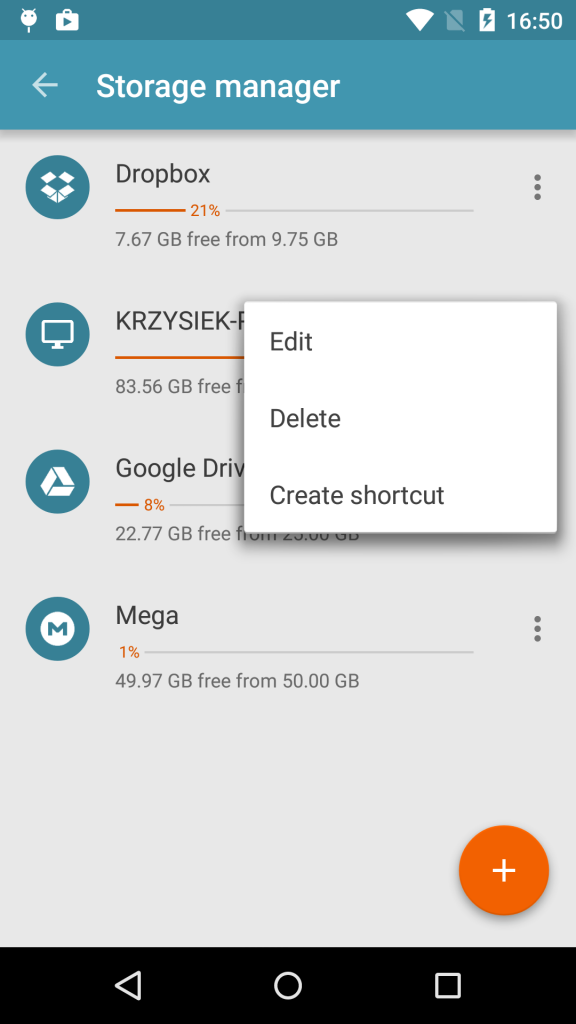
Storage Manager and Bookmark Manager are very similar, they just display and manage different kind of content. Basically they allow you to do the same things: remove, edit, reorder elements and create shortcuts. If you want to change the order of elements, just long click on an item and move it to desired location. Storage Manager displays only storages added by you. You can’t modify persistent storages like root, internal or external.
File properties
Depending on which type of file or folder you want to see, file properties window can contain up to 5 pages. Here is a short description of each page:
- File properties – displays basic information about a file and extended information in case of media and apk files
- Folder properties – displays basic information about a folder
- Contents – displays directory contents with size and percentage of space taken
- File types – displays simple statistics showing how many files belong to particular file types
- Top 20 – displays up to 20 largest files
- Checksums – lets you calculate MD5 and SHA checksums and compare them
- Attributes – shows only on rooted devices for system files. Allows to change file permissions and owners.
You’ll be happy to know that the Top 20 page allows you to select files and perform operations just like in the main window. This means, you can quickly delete the files, that take significant amount of space or just move them to another location.
The overflow menu brings you another bunch of options, which are also available in the context menu of main window. Additionally, there are options to copy the name and path of a file/folder and hide the media inside that folder. The last option will cause the galleries and music apps to stop displaying files in that folder.
Summary
This is the basic knowledge you should have before playing with Solid Explorer. If you have any thoughts or questions, feel free to write them in the comments. I’ll happily update this article with more information.
 Solid Explorer